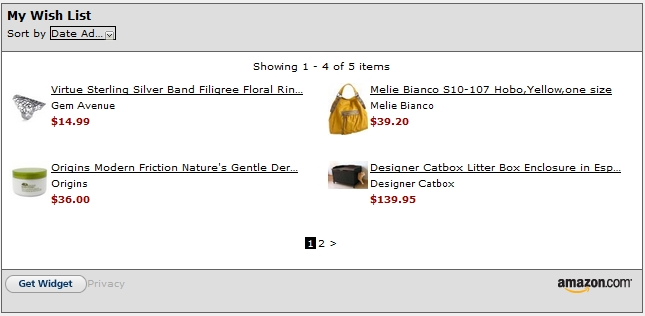
If you use Amazon services you might have a good deal of WISH LIST there.Wish list tells about your wishes they can be anything.For some people they are books, they want to read and some choose random things at all.Today in this tutorial I will tell you about two different ways to embed that WISH LIST from your amazon collections to your WordPress blog.
Why to show your WISH LIST on your Blog?
It is a good question with a simple answer indeed.There may be some visitors those who want to appreciate your work and want to give you some gifts.
- If someone fulfills your wish both, the wish maker and the wish fulfiller can be happy no matter what it costs.
- It is the best way for a reader of a blog to show his love and loyalty.
- It makes you deal with your attitude,I mean most of you don't want to accept donations of-course.
Add your wishlist without the use of a plugin in just two easy steps:
Way 1: Use Amazon’s Wish List Generator
Step 1
The code is not an easy task to fins so I am providing you with link.You’ll need to go to https://widgets.amazon.com/Amazon-Wishlist-Widget/, which isn’t easy to find at all.Customize your widget now.Do it good and charming with nice deal of colors, that suits your blog design the most, or may be those that can touch the heart of your blog readers.
Note: You must sign in if you want to earn through referrals.
SO you are done? No click on “Add to my Webpage” and select “WordPress.org blog” from the options. Copy the code it gives you.
Step 2:
Paste the widget code into a Text Widget on your WordPress blog.
Sign into WordPress Admin dashboard >>Appearance >> Widgets.
Drag the text widget into your side bar and add the code in it.Save it and you are done.You can also post it in a page or post by increasing its widht by code generator you used.
Way : 2 Using a plugin of WordPress
Use My wish list plugin and it will fulfill all your needs.This plugin allows you to create wish lists for your website, and display them on any post or page with simple short code.
Link => My Wish List Plugin
Another plugin to do this work for you is =>Wish Pic
The plugin author states
Each wishlist has the following settings:
- Wishlist name & ID – Used to reference the wishlist, ID must be used when inserting the list
- Wishlist – Which template list to use (defaults to MrMen)
- Thumbnail Width – The width of images presented in the wishlist array
- Thumbnail Height – The height of images presented in the wishlist array
- Array width – The total maximum width of the wishlist array
- Public Access – Allow anyone the ability to check items off the list
- Access Level – If not public, then only allow users of this type the ability to check items off the list
So Decide yourself , which method suits you.
Your Turn:
- Don't forget to tell us what you like?
- Which was the best method?


4 replies on “Add Amazon WISH LIST to your WordPress Blog: Two Ways”
i prefer the 2nd way. using pugin.. its always easy. :)
Yup, some people like plugins some like codes.
Seems like you added a link in your comment.A very bad habit of beginers !
Wow, suprisingly I never knew this. Keep up with good posts.